Steps to Flash TWRP Recovery Without Root With Android ADB Installation
Android Rooting currently common this time and most people do that it wasn’t harm your Android Unless you do experiment with OS commonly its use get Root Access Power to control Android Root environment which actually controls Android System itself but Rooting Android controls of Root in your hand what you do with that Install Tweaks, Installing Custom OS, Increase or Decrees CPU Clock Speed this are advantages of Root
But somehow Android’s Stock Recovery won’t allow you do flash Root Files which can be flashed with TWRP with One of Most Popular Recovery which are capable to that but you need to know that this only possible if you follow proper method of flashing TWRP recovery this need no never and we either go for Rooting One
Things you need before Flashing TWRP Recovery with No Root
We know that it can be installed with Root Like Using Falsify and Rasher In Previous Post we there is detail guide are already present the Root Process and without Root Process but this was a ADB installation method which can be perform right now if you take some patience then it will takes few movement depends upon you how you perform it
Note that
Android2techpreview is not responsible for any damages you are own responsible for doing
Before you Jump for the Installation Be carefully Prepare for Following
- Please Maintain Battery Percentage at least 70 is ok
- Please take your Android Files Backup
- Keep in mind In The Process of Flashing don’t Plug out Your Android in Any case
- This works cool in Stock Android Device’s if not works
Please let us know in comment
How To Flash TWRP recovery Right now with ADB
Preparing your Android Now you are ready go for flashing
TWRP recovery
Download Android ADB File
Extract Files

Properly Install it First in PC
How to install it now
After clicking on “Run on Administrator”
You will See Something “Yes/No”
Processed with “Yes”
Now you will in Below images
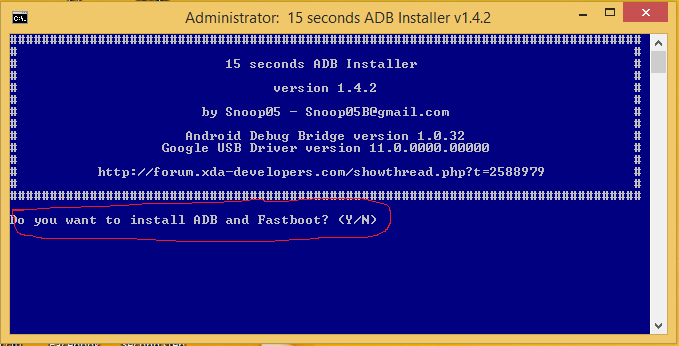
You will See
“Do you want to install ADB and Fastboot“
Opt “Y”
Next

Install ADB System-wide ?
Again Opt “Y”

then you see
“Do you want install device Drivers”
Again Opt “Y”

Now the Driver installation Setup

Click to Next

Now the installation is Finalized
After
Simply Go following
C>ADB>
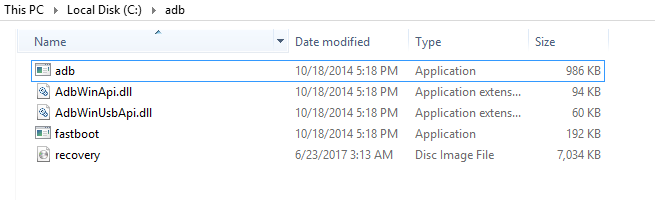
Stop on ADB folder
“Make Sure You paste your Recovery File which you Download earlier“
Plug your Android to PC
(if you are currently using Android Marshmallow or later Android you will notice that in your Developer option you find that OEM unlocking present simply enable for OEM unlocking or if your using any lower android version 4x or later then you need to be Unlocked Your Boot loader otherwise this whole process won,t work for you)
Don’t worry if your Android Boot loader Not yet Unlocked
Checkout Here How to do that First
Simply Hold Your Android Boot in your Stock Recovery
Press Power and Volume (+) for Moto e Volume (-) Down
If Your Stock Android Recovery Pop-ups
You Need to go For “Fastboot option”
If Not Present there (Don,t Worry)
Plug Your Android to PC
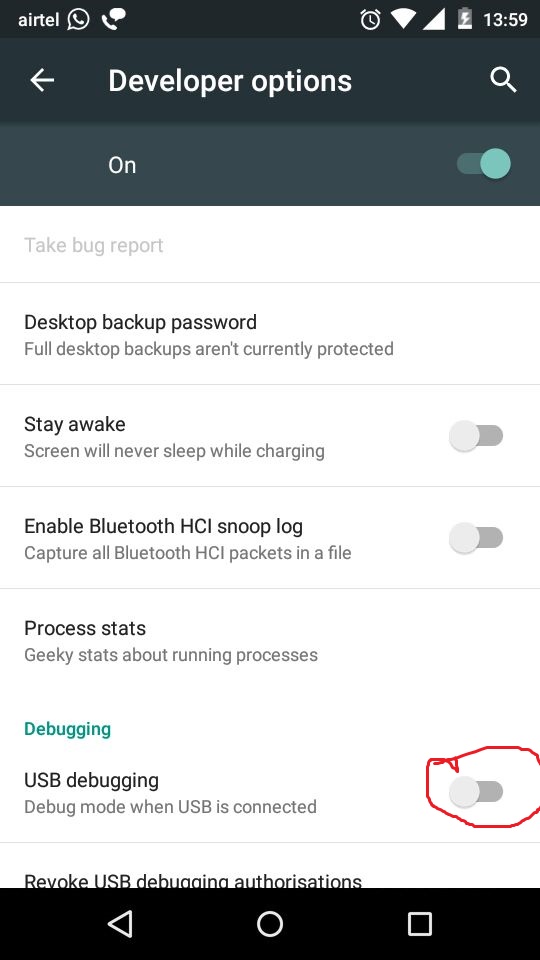
Enable USB Debugging
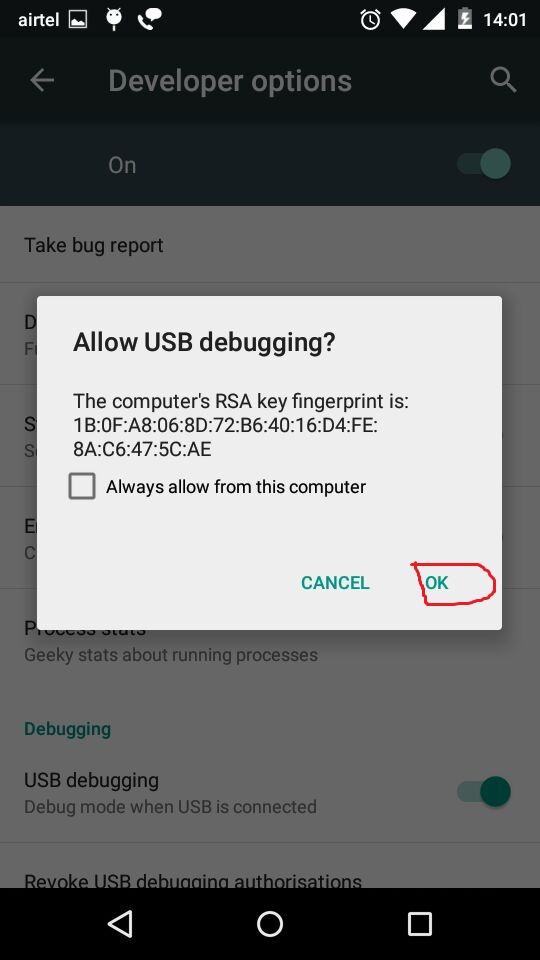
and Also allow Permission for debug
Open Command Prompt
Type
Adb reboot Bootloader
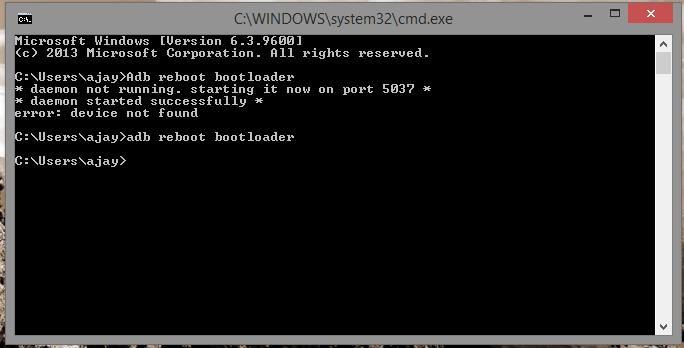
It Might it Fix now
When Fastboot Appears
Now Action Time
Type(In Command Prompt)
Fastboot OEM unlock
Warning will Appears Now Go with Yes Option
Now Successfully unlocked your boot loader
Now
Type
.
Fastboot Reboot
Done
Now after your Android Boot loader unlocked
You can flash Right now the recovery
So, You Need to again go with Recovery but before you boot
Choose TWRP file Accordingly your Device
Place file into your ADB folder

Now Again Boot with Stock Recovery
Choose for Fastboot (if pop-ups)
Open Command prompt
Type
“Fastboot Device”
For Checking your Device is listed or not
If listed great “”
Then type
Fastboot Flash Recovery Recovery.img
(Make sure TWRP recovery name must be Recovery if not rename it)
When it Starts Flashing
Wait for the process end
At Final
Type
Fastboot Reboot
Now Checkout Your TWRP Recovery now properly installed
If it not works for let us know
is This works for you or not ?
Please leave your comment
For more Follow us on![]()
![]()
![]()
Please leave your comment
For more Follow us on
